
Manually Importing Demo Content
If you ran into issues importing demo content automatically, here’s how to import demo content the manual way.
- You should’ve received a zip folder when you purchased your theme, something like wordpress-theme-name.zip. Unzip this folder.
- Locate the folder demo-import inside and click on it.
- Inside you’ll find all the files needed to import the demo content. Files with an extension of .xml are for content/images, etc., .dat files are for Customizer settings, and .wie is for widget settings.
- Go Import Demo Data under Appearance and click on “Switch to manual import!”
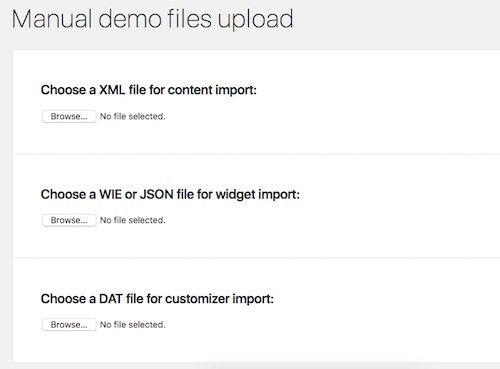
- Browse and select the correct file for all three uploaders. If you want to import content from the Demo 1 layout, upload theme-name-demo-1.wie, theme-name-demo-1.dat, and theme-name-demo-content.xml. For the Demo 2 layout, upload theme-name-demo-2.wie, theme-name-demo-2.dat, and theme-name-demo-content.xml, etc.
- Wait for the import to finish before you click away from the page or close the tab.
- You’re done! Check your site to make sure the import was finished successfully.