Header Images

All page templates (with the exception of the plain default page template) come with a top header image, as seen above. To add an image to the header, you need to use the Gutenberg Block Editor. It won’t work with the Classic Editor. If you’re new to WordPress and don’t know which editor you have, you most likely have the Block Editor since that’s the default one.
Here’s how to get started:
- First, create a page by going to Pages > Add New in your dashboard.
- While editing the page, add a block by clicking on the blue plus sign at the top left of your page or the black plus sign at the bottom right-hand part of your page.
Note: WordPress keeps changing the location and look of these buttons, so don’t panic if you can’t find them. Basically, you just need to add a block, wherever that might be, on your particular editing screen.
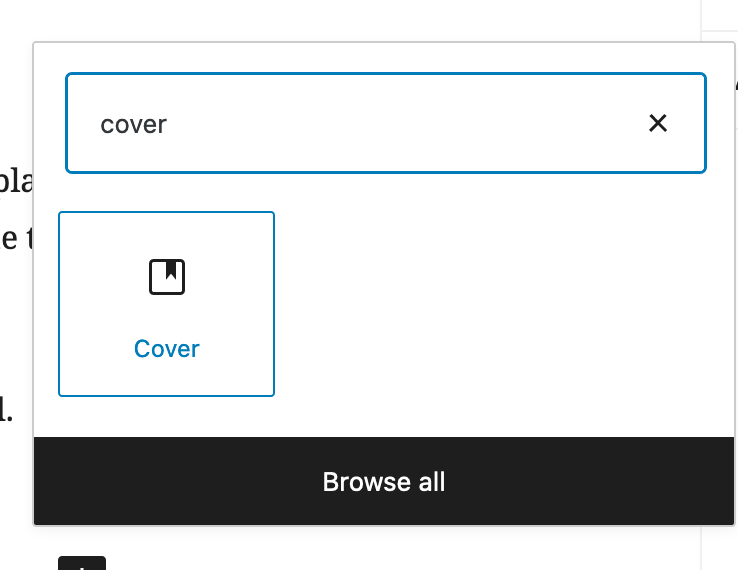
- Next, add the “cover” block to your screen. If you can’t find the block, you can search for it by typing “cover.”

- Next, click on “upload” to upload a picture. WordPress also lets you add text on top of the picture, but it’s optional and not really recommended as it doesn’t really go with the design.
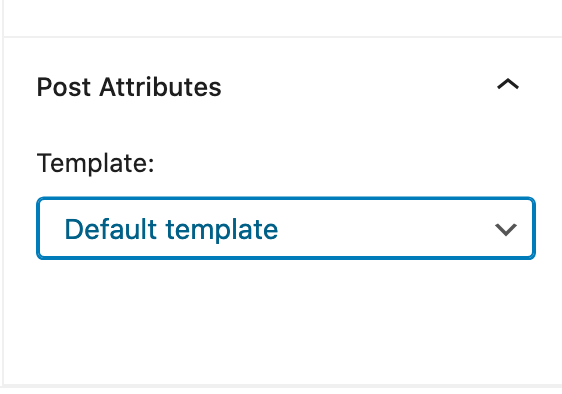
- Before saving, make sure to choose a template from the dropdown menu under Post Attributes (for 5.8 and above, simply look for Template) in the bottom right-hand part of the side menu.
- After saving, check the page to now see your new header image. To change the color overlay, the option for that is under Appearance > Customize > Honeyglow Options > Color Options.
- For whatever reason if you choose not to upload a picture, the design will fall back to a solid color.