
Getting Started
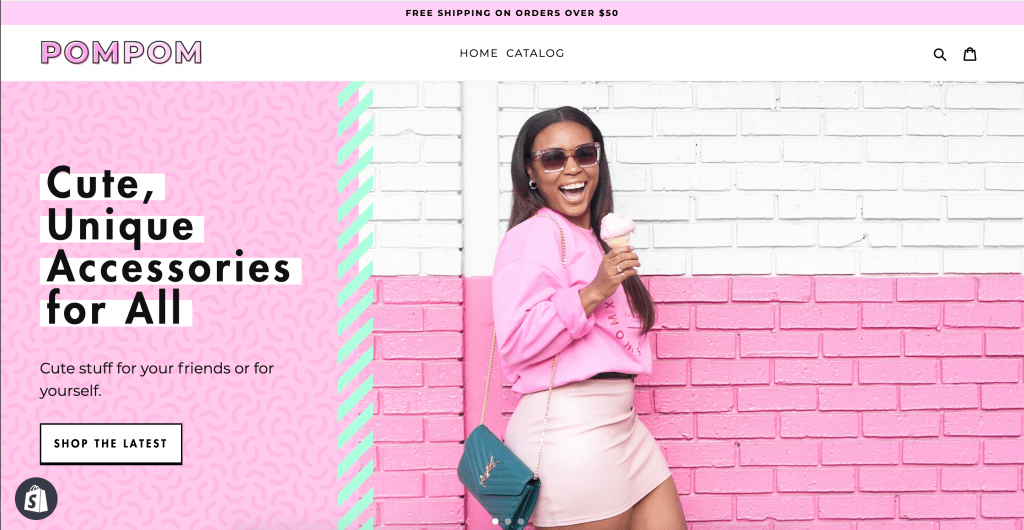
Thanks for choosing Little Theme Shop! Here’s how to get started with your new Shopify Theme. Although the screenshots show PomPom, the instructions apply for all our Shopify themes.
If you’re more of a visual learner, watch the Getting Started video below. For written instructions, keep scrolling.
Step 1. Upload the Theme
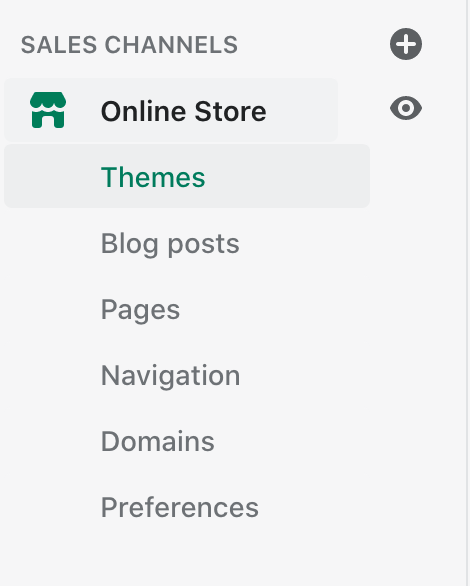
While logged into Shopify, go to Online Stores > Themes.
Next, scroll down to Theme Library and click on “Upload Theme.”
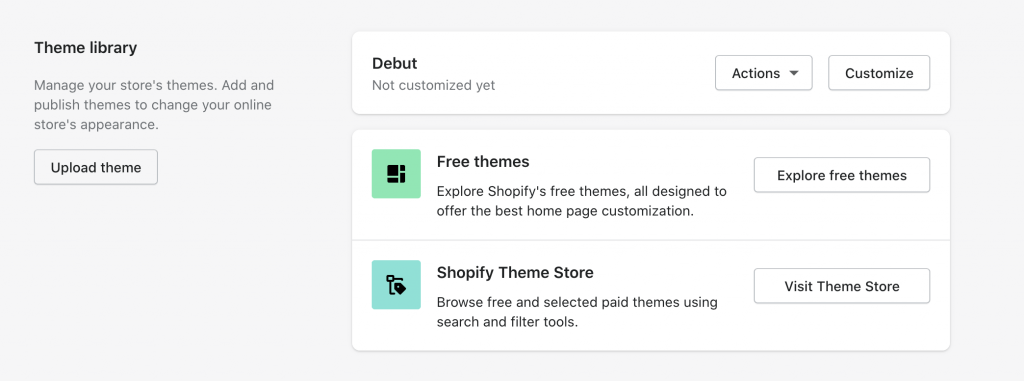
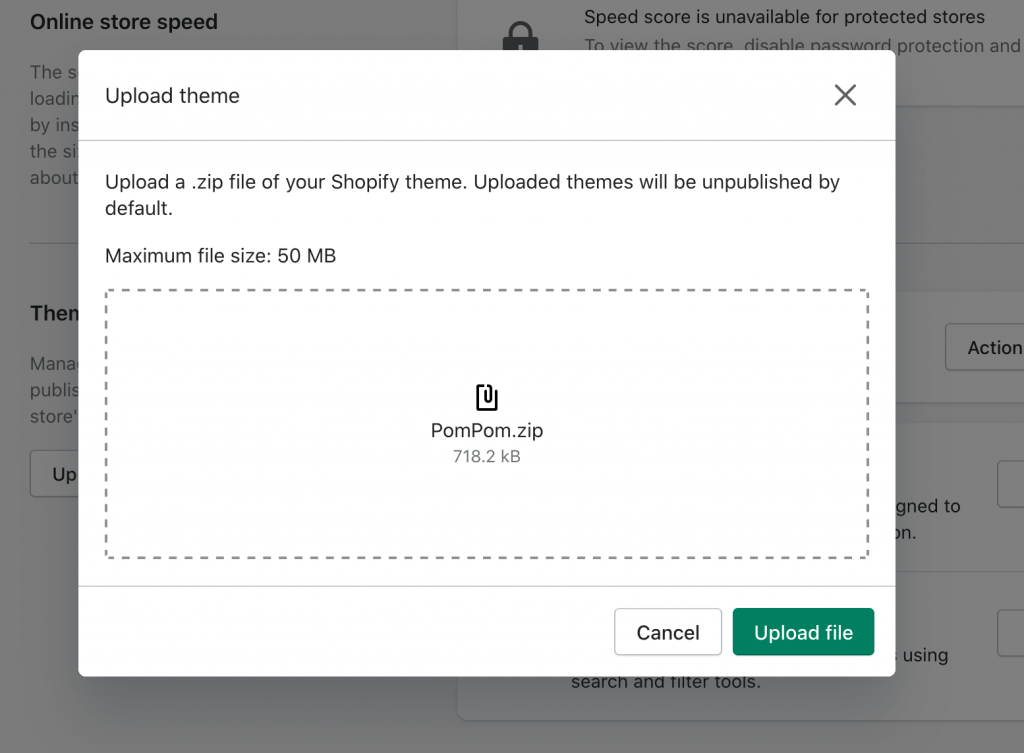
After purchasing the theme, you should’ve received a zip folder named themename-shopify-theme.zip. Unzip this folder. Inside you should find another zip named ThemeName.zip. This is the file you’ll use to upload the theme. Do not unzip it. Simply upload it as-is and click Upload file.
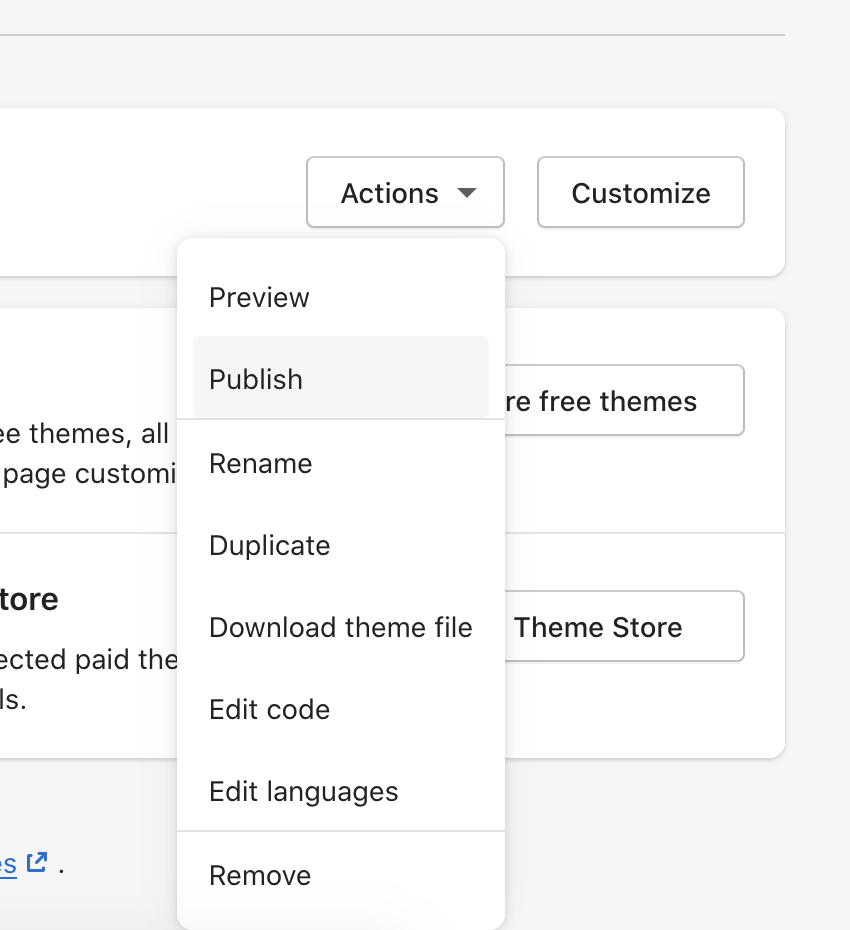
Once the theme is uploaded, click on Publish to make it live.
Congrats! The theme is now uploaded. If you don’t want to import demo content, you can skip ahead and start customizing your theme. If you want to import demo content, keep reading.
(Note: You don’t have to import demo content. It’s only recommended for new sites that don’t have any content or products yet. If you decide to skip steps 2 through 4, the site will still be set up like the demo except with placeholders in place for the products and images.)
Step 2: Import Images
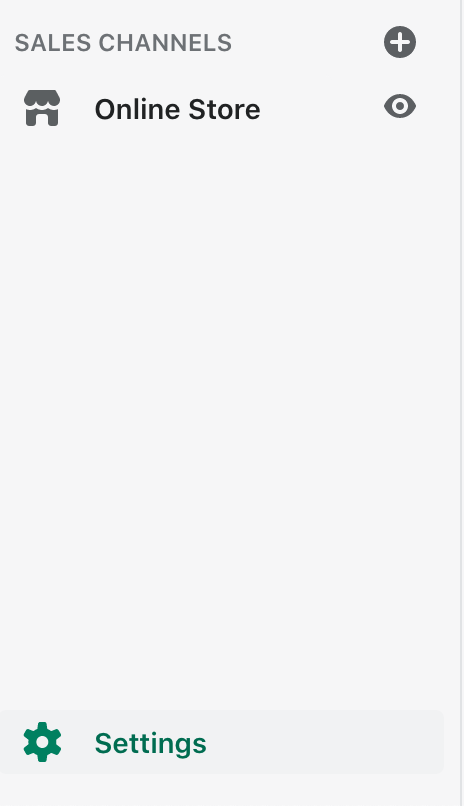
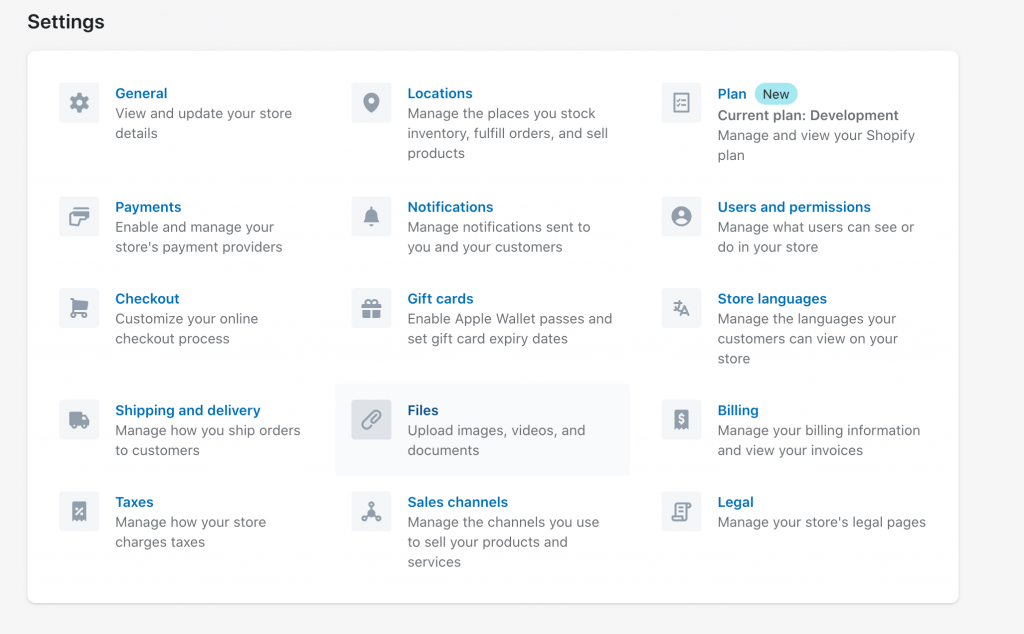
Head on over to Settings. This is located in the bottom left-hand side of your screen.
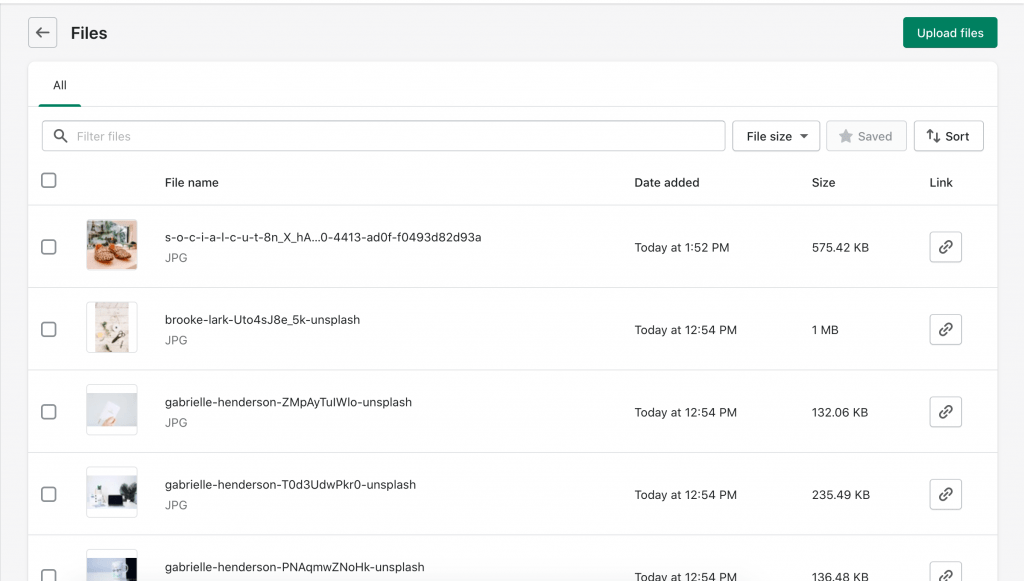
Next, click on Files. (Update 5/5/2023: This is now located under Content > Files)
In the top right-hand corner, click the green button that says Upload files.

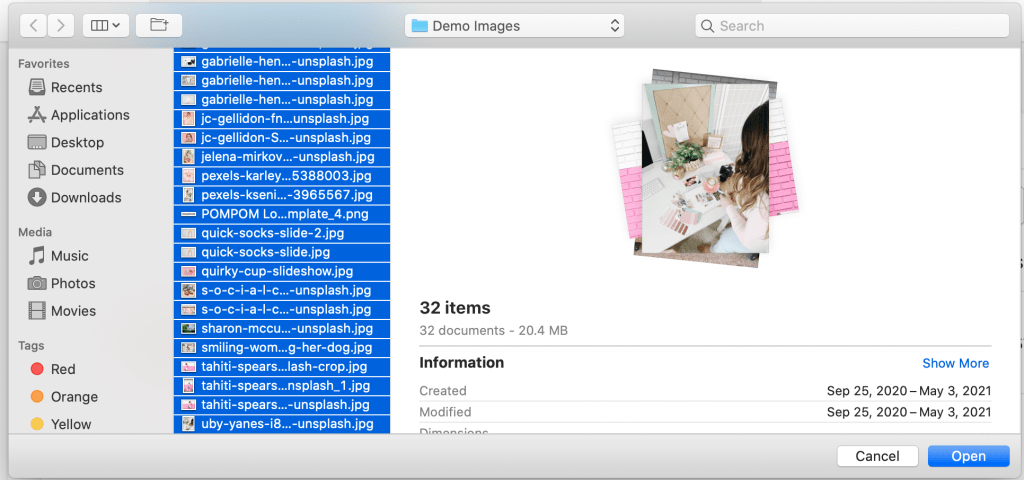
Next, find the Demo Data folder inside of your themename-shopify-theme folder that came with your purchase. Inside that folder is another folder named Demo Images.
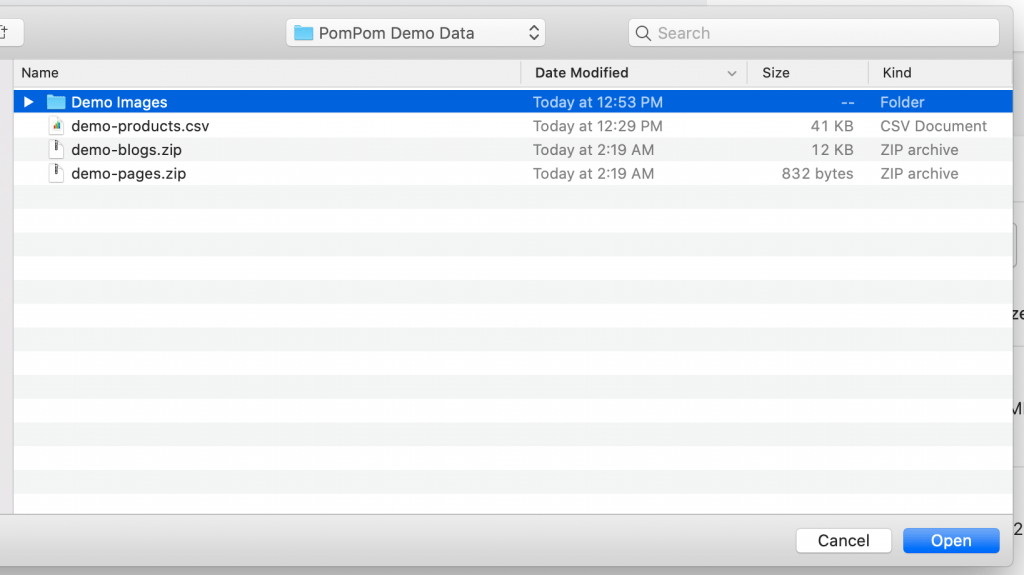
Highlight all the images in the folder and click “open” to bulk upload them.
The process might take a few minutes, but once it’s done, your Files should now include all the demo images.
Step 3: Import Products
Go to Products in your dashboard and click on “Import” in the top right-hand corner. (Note: Importing products is not recommended if you already have existing products on your site.)

Next, go to your Demo Data folder and find demo-products.csv. Select that file and click Upload and continue.
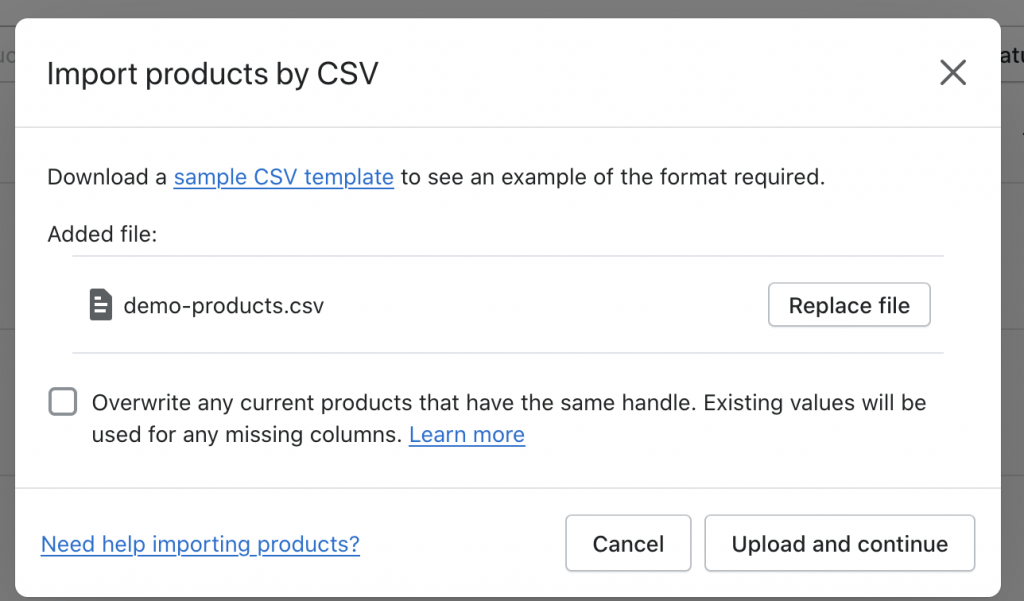
There are 41 demo products, so go make yourself a cup of coffee while it’s importing. It’ll take a few minutes! Once it’s done, all the products should be listed under Products.
Note: Collections do not import. You’ll still need to create those yourself from under Products > Collections.
Step 4: Import Pages and Blogs
First, download this app. (A promo code is included with your download to access the app for free.)
Once the app has been downloaded, click on Apps in your sidebar to go to the Apps page. The app should now be listed under Installed apps. Click on it to open it.
Note: If you run into errors while using this app, close the tab or window and return to your main Admin Screen page. Next, click on the app again and the settings should show.


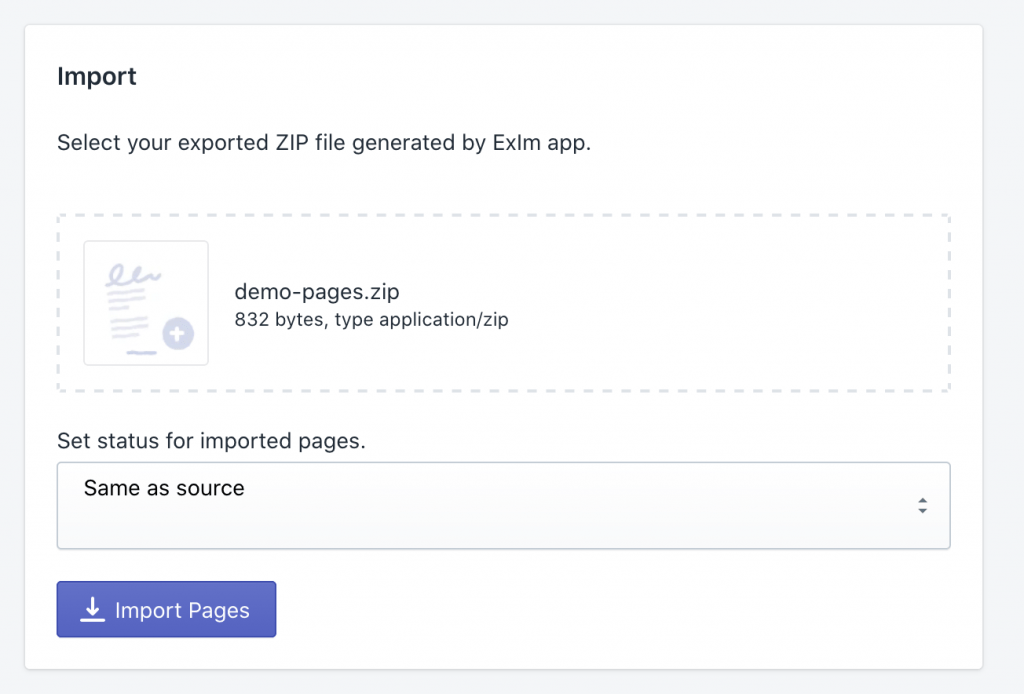
To upload the demo pages, click on Add File in the Pages section. Next, go into your Demo Data folder and locate demo-pages.zip. No need to unzip it — simply upload it as-is.
Scroll past the Theme Settings section (you don’t need it) and scroll down to the Blogs section. Find demo-blogs.zip in your Demo Data folder and upload it.
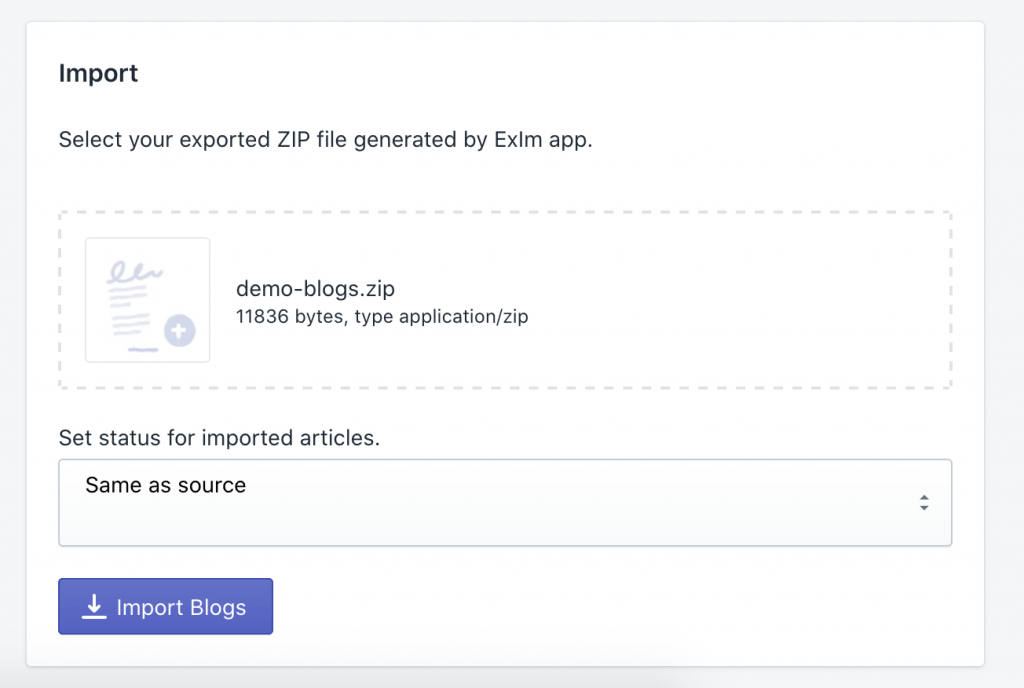
The blog import will take about a minute, but once it’s done, you can give yourself a pat on the back because you’re all done with importing! Yay!
Step 5: The Fun Part: Customizing
Go to Online Store > Themes and click on the green “Customize” button to start editing your theme! If you imported all the demo data, it should look just like the demo, with the exception of menus and collections.
This concludes the Getting Started tutorial. If you’re familiar with Shopify, you should be able to figure out the rest from here. If you’re a total newbie, keep reading the following docs below: