

Welcome to the world of WordPress Gutenberg! Get ready to revolutionize the way you create and edit content on your WordPress website. Our WordPress themes only use the Block Editor, so if you need a crash course on how to use it, here’s a great place to start. In this comprehensive guide, we’ll take you on a delightful journey through Gutenberg, exploring its features, benefits, and empowering you to unlock your creative potential. So grab a cup of your favorite beverage, get cozy, and let’s dive into the wonderful world of Gutenberg!
What Is Gutenberg?
Imagine Gutenberg as the stylish new makeover for your WordPress editor. It’s like trading your trusty typewriter for a sleek, state-of-the-art laptop. Gutenberg is the modern block editor introduced in WordPress 5.0, designed to make your content creation experience more intuitive, visual, and flexible. With Gutenberg, you’ll bid farewell to the monotonous scroll of endless text and welcome a world of content organized in distinct blocks.
Key Features and Advantages of Gutenberg over the Classic Editor
Gutenberg isn’t just a fancy new name for the classic editor; it brings a plethora of game-changing features to the table. Here’s a glimpse of what makes Gutenberg stand out:
- Visual and Intuitive Editing: Gutenberg introduces a more visual and user-friendly editing experience. With its drag-and-drop functionality, you can easily arrange blocks of content in any order you desire, like rearranging furniture in your dream home.
- Streamlined Content Creation: Say goodbye to cluttered interfaces and hello to a clean and organized workspace. Gutenberg’s clean design allows you to focus on one block at a time, enhancing your productivity and creativity.
- Versatile Block Library: One of the most exciting aspects of Gutenberg is its extensive library of blocks. From text and images to galleries, videos, and more, these blocks offer endless possibilities for creating engaging and interactive content without needing to rely on additional plugins.
- Enhanced Customization Options: Gutenberg empowers you to personalize your content like never before. Each block comes with its own set of customization options, allowing you to tweak fonts, colors, alignments, and more, all within the editor itself. It’s like having a mini design studio right at your fingertips.
Understanding the Concept of Blocks and Their Flexibility in Content Creation:
Think of blocks as the building blocks (pun intended) of your content. Each block represents a specific content element, such as a paragraph, heading, image, quote, or even a custom block you create. The beauty of Gutenberg lies in its flexibility—blocks can be easily added, rearranged, and customized to create stunning layouts and captivating content.
The block-based approach allows you to focus on one piece of content at a time, making it easier to manage and edit your content. You can think of it as playing with a set of digital Legos, where you have the freedom to stack, combine, and transform blocks to bring your vision to life.
With Gutenberg, you’re no longer confined to a linear flow of text. You can experiment with different block types, insert multimedia elements, and create visually appealing layouts without needing to dive into complex code or rely heavily on external plugins.
Getting Started with Gutenberg
Now, let’s roll up our sleeves and dive into the practical aspects of getting started with Gutenberg. In this section, we’ll guide you through updating WordPress, navigating the Gutenberg user interface, and exploring the diverse range of block types available.
How to Update to the Latest Version of WordPress that Includes Gutenberg
Before you embark on your Gutenberg adventure, it’s crucial to ensure you have the latest version of WordPress installed. Here’s a simple step-by-step guide to updating your WordPress to include Gutenberg:
- Backup your Website: Before making any major changes, it’s always a good practice to create a backup of your website. This ensures that your content is safe and sound.
- Check Compatibility: Confirm that your theme and plugins are compatible with Gutenberg. Most reputable themes and plugins have already made the necessary updates, but it’s wise to double-check just to be on the safe side.
- Update WordPress: Go to your WordPress dashboard and navigate to the Updates page. If there’s a new version of WordPress available, you’ll see a notification. Click on the “Update Now” button to begin the update process. Once the update is complete, you’ll be ready to experience Gutenberg firsthand.
Navigating the Gutenberg User Interface and Understanding Its Main Components
Now that you’re equipped with the latest version of WordPress and Gutenberg, let’s take a tour of the Gutenberg user interface. Here are the main components you’ll encounter:
- The Editor Screen: As you open the Gutenberg editor, you’ll notice a clean and uncluttered workspace. This is where you’ll create and edit your content using blocks.
- The Block Inserter: Located at the top left of the editor screen, the block inserter is your gateway to the world of blocks. It allows you to add new blocks to your content seamlessly. You can search for specific block types or browse through different categories to find the perfect block for your needs.
- The Block Toolbar: Each block comes with its own set of options and settings. When you select a block, the block toolbar appears above it, offering various formatting and customization options. The toolbar gives you control over the appearance and behavior of your blocks.
- Document Settings: On the right side of the editor screen, you’ll find the document settings panel. Here, you can configure general settings such as post title, categories, tags, featured images, and more. Additionally, you can access advanced settings like permalinks and publishing options.
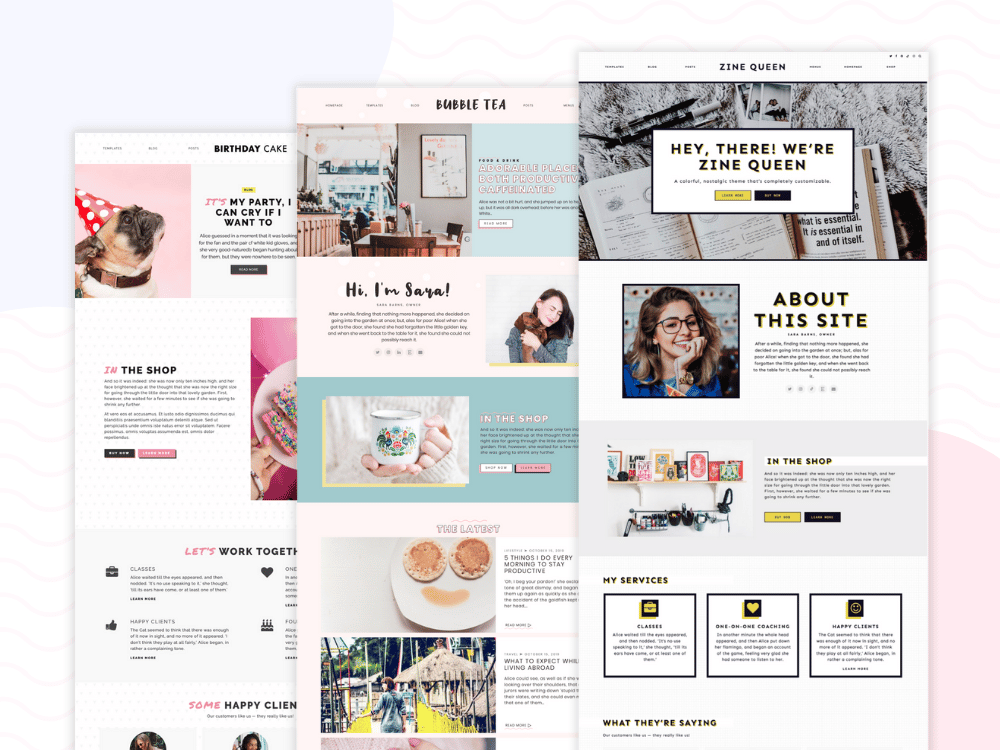
Shop Block Themes
Our WordPress themes are fast, easy to edit, and 100% Gutenberg. 💛
Exploring the Available Block Types and Their Functionalities
Now, let’s jump into the fun part—creating captivating content with Gutenberg! Think of each block as a content superhero with a unique power. You have blocks for paragraphs, headings, images, videos, quotes, buttons, and so much more. Adding blocks is as easy as a few clicks, and arranging them is a delightful drag-and-drop experience. Need to tweak the text size or add a splash of color? No problem! Gutenberg offers formatting options within each block, so you can make your content shine like a star.
Creating Content with Gutenberg
Now that you’re familiar with the Gutenberg user interface, let’s unleash your creativity and dive into the exciting world of content creation. In this section, we’ll explore the process of adding and arranging blocks, discover formatting options within each block, and leverage the power of reusable blocks. Get ready to craft engaging posts and pages that will captivate your audience!
Adding and Arranging Blocks to Create Engaging Posts and Pages
Gutenberg empowers you to think beyond the limitations of traditional content creation. With its block-based approach, you have the freedom to mix and match different types of blocks to create visually stunning and engaging posts and pages. Here’s how you can add and arrange blocks with ease:
- Adding Blocks: To add a block, simply click on the “+” icon or use the slash (“/”) command. The block inserter will appear, allowing you to search for a specific block or choose from various categories. Once you find the desired block, click on it, and it will be added to your content.
- Arranging Blocks: Gutenberg’s drag-and-drop functionality makes rearranging blocks a breeze. Simply click on the block you want to move and drag it to the desired position. This flexibility enables you to experiment with different layouts and find the perfect structure for your content.
- Block Alignment: Gutenberg offers options to align blocks to the left, center, right, or justify them. These alignment settings allow you to create visually appealing content with proper balance and aesthetics.
Exploring the Formatting Options Within Each Block
Gutenberg goes beyond basic text formatting. It offers a range of formatting options within each block, allowing you to customize the appearance of your content. Here are some common formatting options you can explore:
- Text Styling: Within text blocks, you can choose from various formatting options like bold, italics, underline, strikethrough, and more. These styling options help emphasize important points and add visual interest to your text.
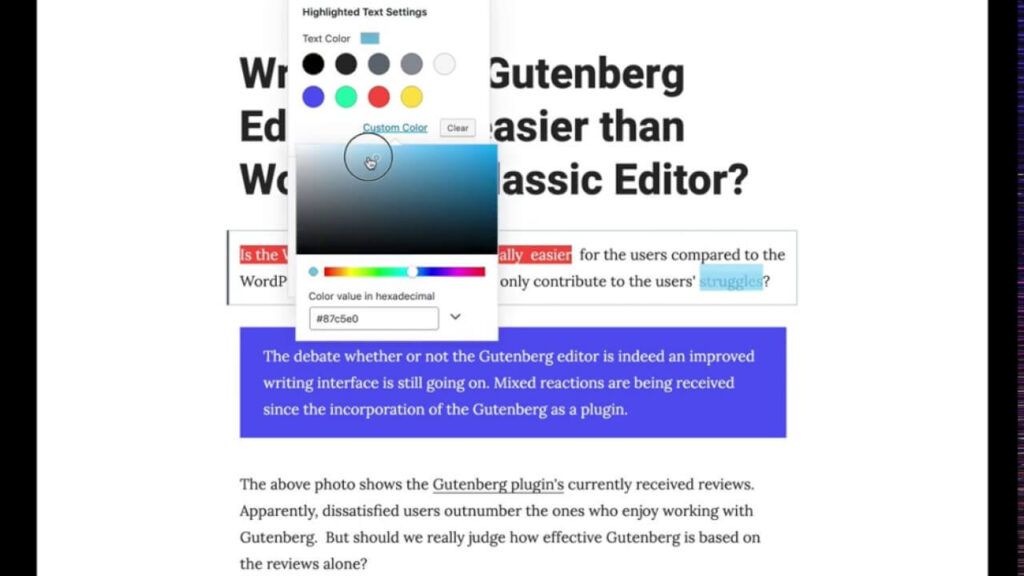
- Colors and Backgrounds: Many blocks in Gutenberg allow you to customize colors and backgrounds. From changing the font color to selecting a background color or even adding gradient backgrounds, you can make your content visually appealing and on-brand.
- Block-specific Settings: Different blocks have unique settings and options to enhance their functionality. For example, the image block allows you to adjust image size, add alt text for accessibility, and choose alignment options. The video block allows you to embed videos from various platforms and customize playback settings.
Using Reusable Blocks for Frequently Used Content Elements
Reusing content elements that appear frequently across your website is a time-saving feature offered by Gutenberg. With reusable blocks, you can create a block once and use it in multiple locations without having to recreate it every time. Here’s how you can leverage reusable blocks:
- Creating a Reusable Block: Once you’ve created a block that you want to reuse, select the block and click on the “Block” tab in the toolbar. From the dropdown menu, choose “Add to Reusable Blocks.” Give your reusable block a name, and it will be saved for future use.
- Inserting a Reusable Block: To insert a reusable block into your content, click on the “+” icon or use the slash (“/”) command to open the block inserter. Under the “Reusable” tab, you’ll find all your saved reusable blocks. Select the desired block, and it will be added to your content.
- Editing Reusable Blocks: If you need to make changes to a reusable block, simply edit it once, and the changes will be reflected across all instances where the block is used. This ensures consistency and saves you from manually updating the same content in multiple places.
Advanced Gutenberg Features
You’ve mastered the basics of Gutenberg, and now it’s time to take your content creation skills to the next level. In this section, we’ll delve into advanced Gutenberg features that will elevate your website’s design and functionality. Get ready to explore the block library, customize block styles, colors, and typography, and unlock the power of pre-designed layouts using block patterns. Let’s dive in!
Exploring the Block Library and Installing Additional Block Plugins
Gutenberg’s block library is a treasure trove of pre-built blocks that extend the capabilities of the editor. While Gutenberg comes with a rich selection of blocks out of the box, you can further enhance your options by installing additional block plugins. Here’s how to make the most of the block library:
- Block Library: Gutenberg offers a diverse range of blocks to suit various content needs. From multimedia blocks like galleries and videos to interactive blocks like buttons and forms, the block library provides an extensive collection of blocks that you can easily add to your content.
- Installing Block Plugins: If you’re looking for even more block options, you can install block plugins from the WordPress plugin repository. These plugins add new blocks to your Gutenberg editor, giving you an expanded toolkit to work with. Simply go to the Plugins section in your WordPress dashboard, search for the desired block plugin, and click on “Install” and then “Activate” to add it to your Gutenberg editor.
Customizing Block Styles, Colors, and Typography
One of Gutenberg’s remarkable features is the ability to customize block styles, colors, and typography right within the editor. This allows you to maintain brand consistency and create a unique visual identity for your website. Here’s how you can unleash your creativity:
- Block Styles: Gutenberg provides built-in style options for many blocks. These styles offer predefined combinations of colors, fonts, and formatting that you can apply with a single click. Select a block, access the block toolbar, and choose a style from the available options to instantly transform its appearance.
- Custom Colors: If you want to go beyond the predefined color options, Gutenberg allows you to define custom colors for your blocks. Within the block toolbar, you’ll find a color picker that enables you to select any color of your choice or input specific color codes to match your brand’s palette.
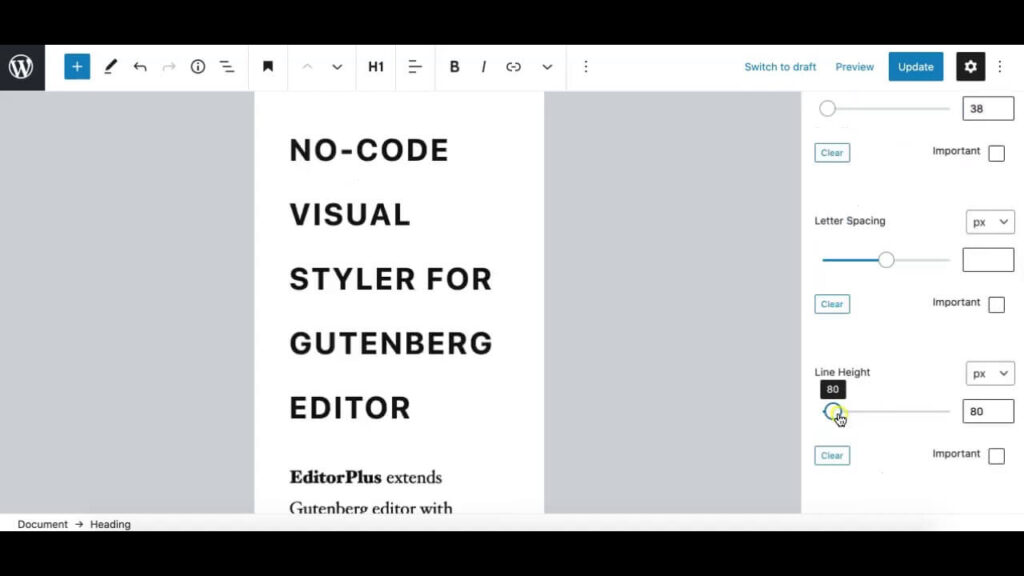
- Typography Settings: Gutenberg also provides typography customization options for text blocks. You can adjust font sizes, line heights, letter spacing, and even choose from a variety of fonts to create a visually appealing and consistent typographic style throughout your content.
Leveraging the Block Patterns Feature for Pre-designed Layouts
Block patterns are a powerful feature of Gutenberg that allow you to quickly create intricate layouts using pre-designed combinations of blocks. These patterns enable you to save time and effort by providing ready-made layouts for various content sections. Here’s how you can leverage block patterns:
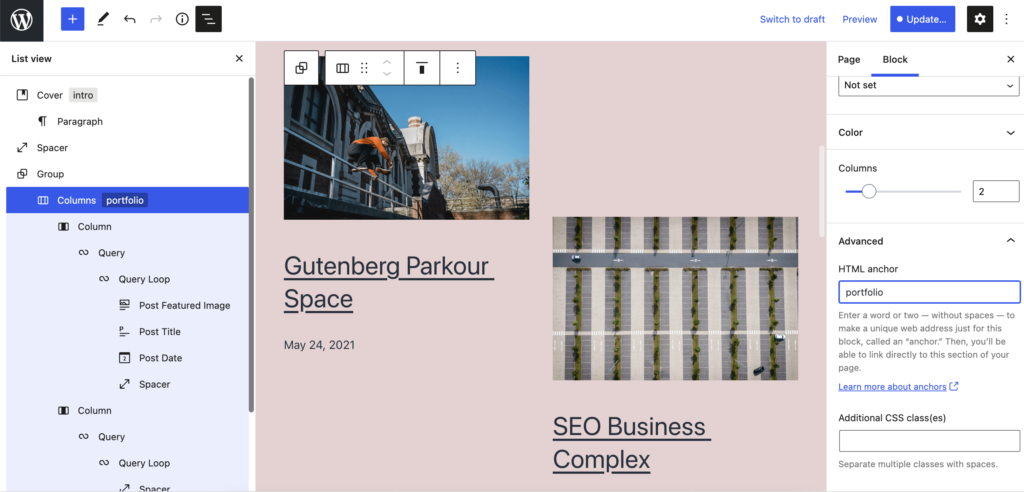
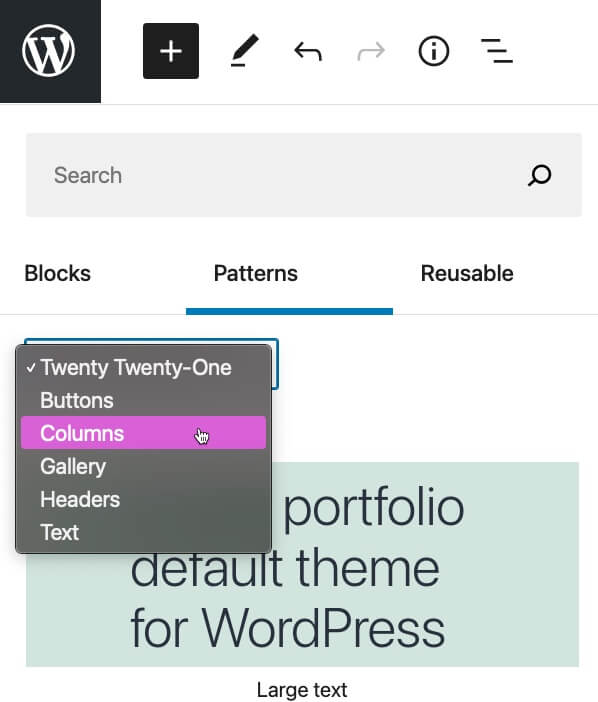
- Accessing Block Patterns: When adding a new block, click on the “+” icon or use the slash (“/”) command to open the block inserter. Under the “Patterns” tab, you’ll find a collection of pre-designed block patterns that you can browse through.
- Applying Block Patterns: Select a block pattern that suits your content needs and click on it to insert it into your layout. Block patterns can include a combination of different blocks arranged in a specific way, offering instant design inspiration and saving you the trouble of manually designing complex layouts.
- Customizing Block Patterns: Once you’ve inserted a block pattern, you can customize it to align with your brand and content. Modify text, replace images, adjust colors, or add/delete blocks as needed. Block patterns provide a solid foundation that you can build upon to create a unique and visually appealing layout.
Tips and Best Practices
Congratulations! You’re now well-versed in the Gutenberg editor. To help you maximize your productivity and navigate potential challenges, we’ve compiled some valuable tips and best practices. From optimizing your workflow with keyboard shortcuts to organizing and managing large amounts of content, as well as troubleshooting compatibility issues, these insights will ensure a smooth and efficient Gutenberg experience. Let’s dive in!
Optimizing Your Workflow with Gutenberg
Keyboard Shortcuts and Quick Actions: Gutenberg offers several keyboard shortcuts and quick actions that can significantly speed up your content creation process. Here are some handy tips to optimize your workflow:
- Keyboard Shortcuts: Familiarize yourself with Gutenberg’s keyboard shortcuts to perform actions quickly. For instance, you can use “Ctrl + C” to copy a block, “Ctrl + V” to paste a block, or “Ctrl + Z” to undo your last action. A comprehensive list of keyboard shortcuts is available within the Gutenberg editor by pressing “Shift + Alt + H.”
- Quick Actions: Gutenberg provides convenient quick actions that can save you time. For example, you can duplicate a block by clicking on the block and selecting the “Duplicate” option from the block toolbar. You can also move a block up or down by selecting it and using the arrow icons that appear.
Common Troubleshooting Tips and Solutions for Resolving Compatibility Issues
While Gutenberg is designed to be compatible with most themes and plugins, occasional compatibility issues may arise. Here are some troubleshooting tips to resolve common challenges:
- Update Themes and Plugins: Ensure that your themes and plugins are up to date. Developers often release updates to ensure compatibility with the latest version of Gutenberg and address any known issues.
- Disable Conflicting Plugins: If you encounter compatibility issues, try disabling other plugins one by one to identify if any specific plugin is causing the problem. This will help pinpoint the conflicting plugin, allowing you to seek alternatives or reach out to the plugin’s support team for assistance.
- Seek Support and Documentation: If you’re facing difficulties, consult the Gutenberg documentation, which provides comprehensive information and troubleshooting tips. Additionally, the WordPress support forums and plugin-specific support channels are excellent resources for finding solutions to specific compatibility issues.
With these tips and best practices in your toolkit, you’re well-equipped to make the most of the Gutenberg editor. By optimizing your workflow, organizing your content effectively, and troubleshooting compatibility issues, you’ll be able to create stunning, engaging, and seamless experiences for your website visitors. Embrace the power of Gutenberg and watch your content creation process soar to new heights!